Valley Forge Cupolas and Weathervanes 866-400-1776
Follow Us On Social Media!
  • Home
  • Specials
    • Mailboxes, Mailbox and Lantern Posts
  • Gallery
    • Garages
    • Barn Cupolas
  • Cupolas
    • Louver Cupolas
    • Window Cupolas
    • Custom Cupolas >
      • Four Sides
      • Six Sides
    • Estate/Select Series
    • Signature Series
    • Gazebo Cupolas
    • Metal Cupolas
    • Wood/Shed Cupolas
    • PVC-Cedar
    • Cupola Lanterns
  • Weathervanes
    • Sealife
    • Boats
    • Flying Birds
    • Running Animals
    • Finials & Arrows
    • Novelty Weathervanes
    • Smaller
    • Accessories
  • Custom
    • Custom Cupola Installation
    • Royal Crowne Custom
    • VF Custom Designs
    • Digital Garage Quotes
    • Finished Garages
    • Digital Building Quotes
    • Finished Buildings
  • Shop Now
  • Contact
    • Installation >
      • Cupola Sizing Charts
    • Contractors & Developers >
      • Just Completed in Sulphur Springs, Texas (February 2019)
      • Just Completed in Scarsdale, NY (January 2018)
    • Testimonials
    • Cupola Shop Visit
    • Blog
    • Referral Program
    • Partners

How To Assemble A Weathervane

2/25/2022

0 Comments

 
Picture
​Weathervanes are a rare meeting of simplicity and fascination. With few working parts, an uncomplicated design, and a simple function, weathervanes still manage to capture whimsy and wonder around the world. Despite its few parts and straightforward construction, putting together a weathervane can seem daunting at first glance. So if you’re puzzled about piecing together a weathervane, have no fear; let Valley Forge Cupolas show you how to assemble a weathervane!

How To Assemble A Weathervane; What You’ll Get And What You’ll Need

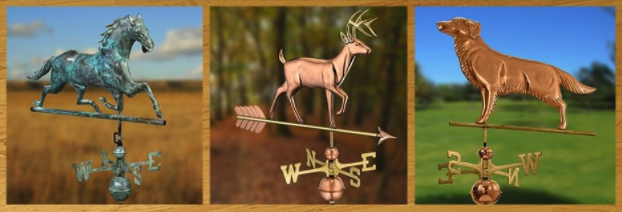
When you buy a weathervane from Valley Forge Cupolas, your kit will include: the weathervane figure, two copper spacer balls, a set of directionals, a brass ring and two assembly rods (one large and one small). Some weathervanes also come with a retaining clip, a necessary piece for any weathervane with a flange. Properly putting together your new weathervane is easy, and you’ll only need a few tools to get the job done right; seek out a set of wrenches, find a flathead screwdriver, and you’ll be ready to get started!

Assembly Rods & Brass Ring

First, place the large assembly rod into the roof mount, garden stake, or base that you’ve chosen to display your weathervane. Then, hand screw the small assembly rod into the top of the large assembly rod. Once hand tight, use wrenches and the tightening slots on each rod to fully tighten the assembly rods. After the assembly rods are installed, slide the brass ring down past the small assembly rod and use a flat head screwdriver to tighten it near the base of the large assembly rod. Be careful; the brass ring will break if tightened too hard!

Large Spacer Ball & Directionals

Once your assembly rods and brass ring are in place, it’s time to move on to the final steps of the weathervane setup! Take the large spacer ball and slide it down over the assembly rods until it’s resting on the brass ring. Now interlock the directionals and place them on top of the large spacer ball, making sure that the set screws are aligned, one above the other. The directionals are meant to remain stationary, so tighten them until they no longer swivel on the assembly rod.

Small Spacer Ball & Weathervane Figure

With the assembly rods, brass ring, large spacer ball and directionals all in place, the weathervane process is nearly complete! Simply place the small spacer ball, large hole first, down on top of the directionals. If you’re worried that the small spacer ball is loose and wobbly, don’t be; it’s meant to have some play. For the final step, place your chosen weathervane figure onto the assembly until it’s resting on top of the small spacer ball. Voila! Your new weathervane is complete!
0 Comments


Leave a Reply.

    Picture

    ​A Little

    About Us

    We are the "Cupola Specialists" who can help you with every aspect of your cupola selection. Let us do a customized digital quote so that you can see exactly how one of our beautiful vinyl or wood cupolas will look on your roof.

    Archives

    December 2022
    November 2022
    October 2022
    September 2022
    August 2022
    July 2022
    June 2022
    May 2022
    March 2022
    February 2022
    January 2022
    December 2021
    November 2021
    October 2021
    September 2021
    August 2021
    July 2021
    June 2021
    May 2021
    April 2021
    March 2021
    February 2021
    January 2021
    December 2020
    November 2020
    October 2020
    September 2020
    August 2020
    July 2020
    June 2020
    May 2020
    April 2020
    March 2020
    February 2020
    January 2020
    December 2019
    November 2019
    October 2019
    September 2019
    August 2019
    July 2019
    June 2019
    May 2019
    April 2019
    March 2019
    February 2019
    January 2019
    December 2018
    November 2018
    October 2018
    September 2018
    August 2018
    July 2018
    June 2018
    May 2018
    April 2018
    March 2018
    February 2018
    January 2018
    December 2017
    November 2017
    October 2017
    September 2017
    August 2017
    July 2017
    June 2017
    May 2017
    April 2017
    March 2017
    February 2017
    January 2017
    December 2016
    November 2016
    October 2016
    September 2016
    August 2016
    July 2016
    June 2016
    May 2016

    RSS Feed

Save Up to 72% Cupola and Weathervane Sale!
For your FREE quote, email MagicCupolas@ValleyForgeCupolas.com or call 866-400-1776!

© 2019. All Rights Reserved.